- Register as a member of the Windows Insider program
- Download latest Technical Review Build 17661 for Raspberry Pi 3 B+
- Mount the iso and optionally extract Windows_10_IoT_Core_RPi3B+.msi
- Install Windows 10 IoT Core for Raspberry Pi 2 (it is for 3B+) on Windows
- Download Windows 10 IoT Core Dashboard to flash ffu image onto SD card
- Run Dashboard to set up a new device
- Insert a formatted MicroSD card to be flashed
- Boot the flashed MicroSD card on your Raspberry Pi 3B+
- Use Dashboard to list and control your Raspberry Pi
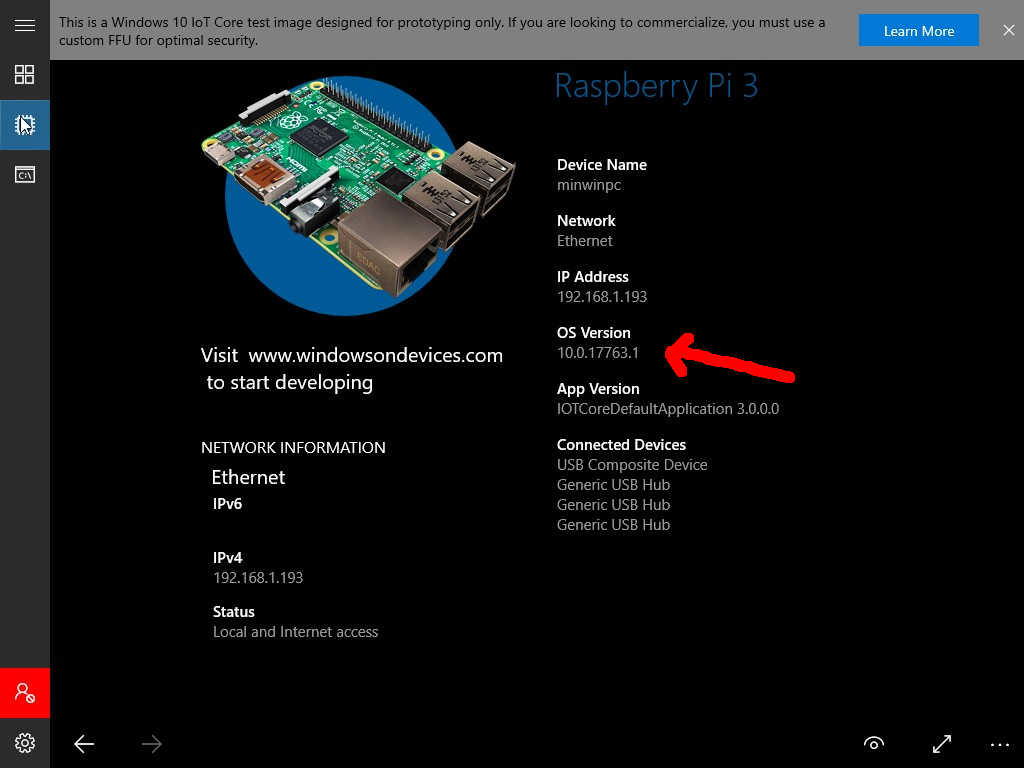
- Use Windows Device Portal to update RPi to latest release 17763 (as of writing)
Due to different boot structure on Raspberry Pi 3 B+, the latest release of Windows 10 IoT 17763 image for Raspberry 2 & 3 (including 17763.107.181026-1406) does not boot on RPi 3 B+. Windows latest Insider Preview 17744 will also not boot.
The last release that boot was the April 2018 release 17661. In this tutorial, I’m going to show you how to install this release and then update to latest October 2018 release 17663.
You will require:
Running Windows 10 machine with SD card reader (USB or direct), an msdos or gpt formatted MicroSD card (Class 10 preferred) 8GB or above (recommend Samsung EVO Plus 32GB or higher), and of course a Raspberry Pi 3 B+ with 2.5A power supply, and Ethernet cable connection with DHCP.
HDMI monitor, USB keyboard and mouse (combo or separate) are optional but useful.
Windows 10 IoT flashing will wipe and re-partition the MicroSD card to provide 1.4GB for MainOS, and the remaining for EFI/boot and Data.
Step 1: Join Windows Insider Program
Register as a member of the Windows Insider program at https://insider.windows.com

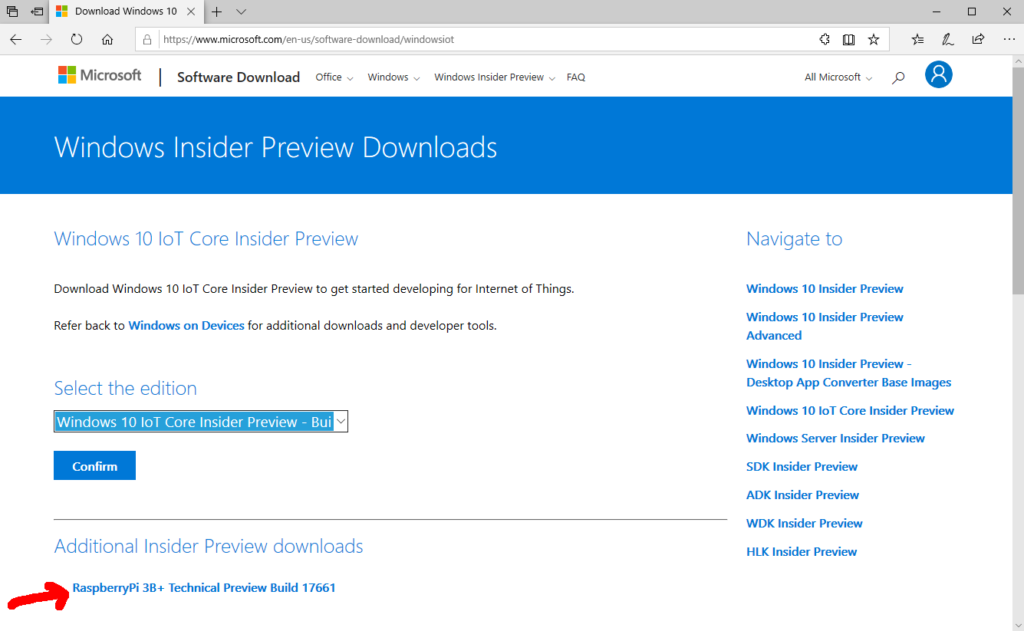
Step 2: Download the right build for your RPi 3B+
Download latest Technical Review Build 17661 for Raspberry Pi 3 B+ from https://www.microsoft.com/en-us/software-download/windowsiot.
Use the link following Additional Insider Preview downloads.
The following iso file will be downloaded.
Windows10_InsiderPreview_IoTCore_RPi3B_en-us_17661.iso
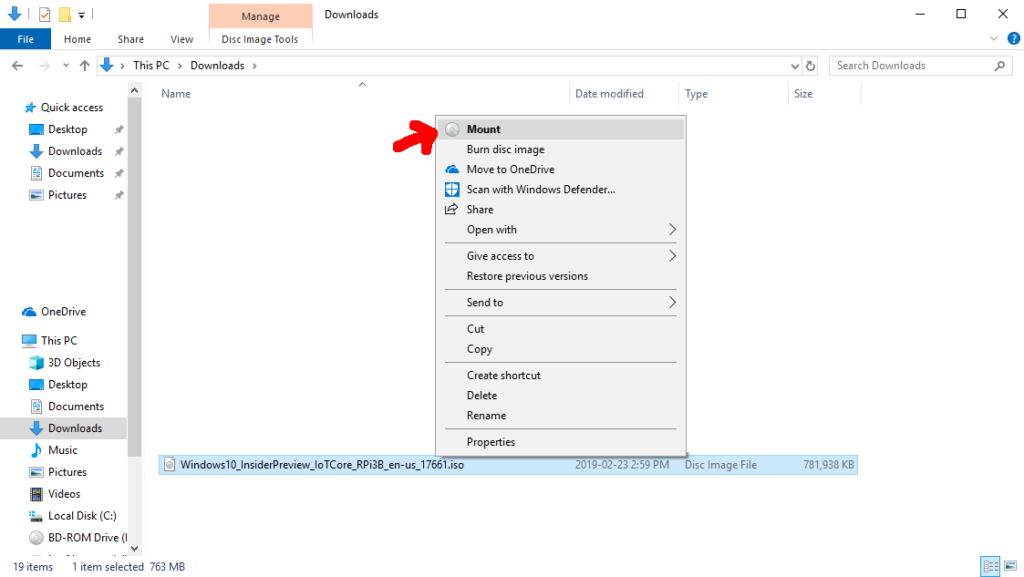
Step 3 : Install Windows IoT image on your computer
Mount the iso file (Right-Click and select Mount) and optionally extract Windows_10_IoT_Core_RPi3B+.msi
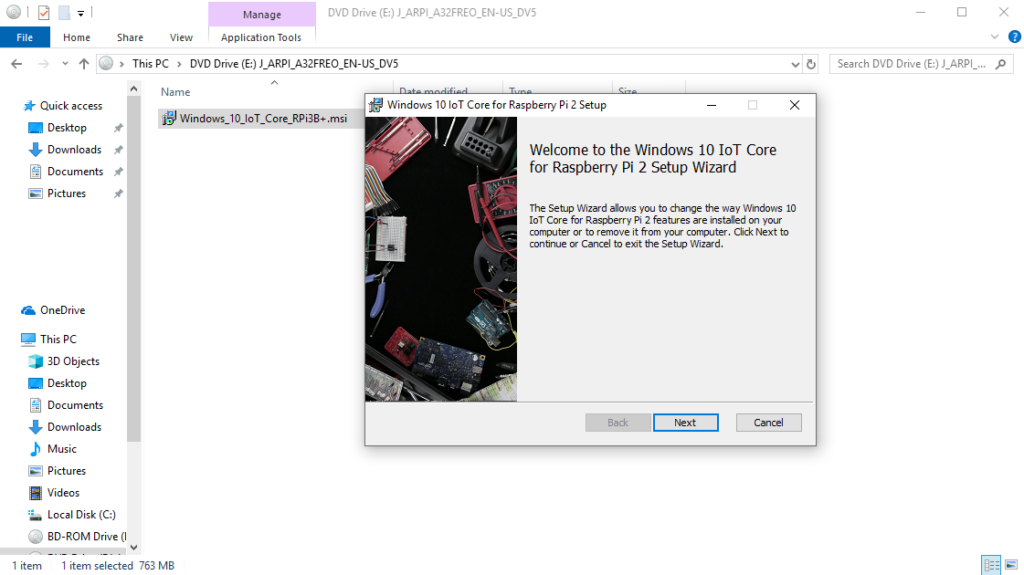
Step 4: Extracting Windows 10 IoT Install Image
Double-click the above msi to install Windows 10 IoT Core for Raspberry Pi 2 on your Windows machine. (It is for 3B+)
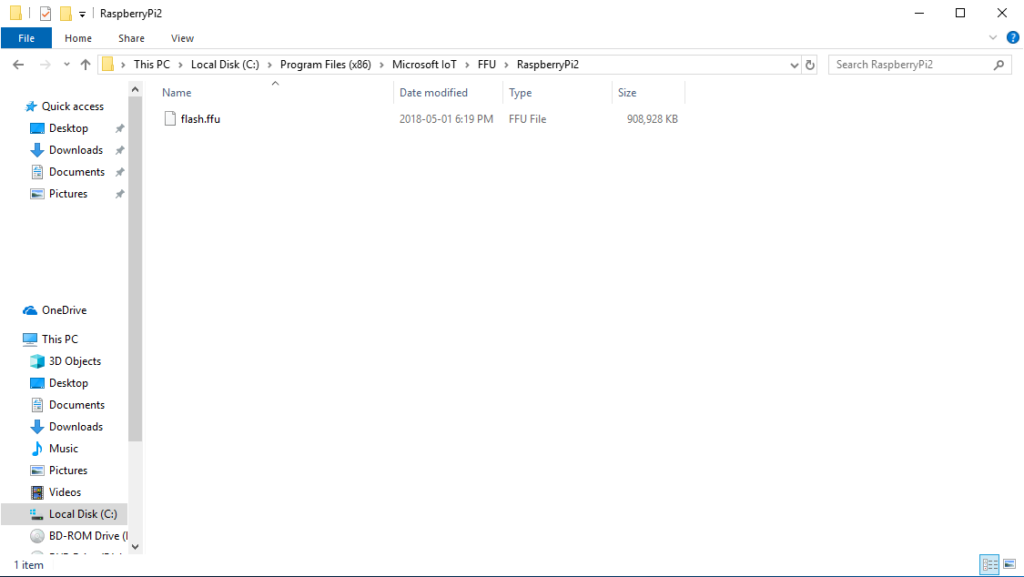
An SD card image for flashing will be installed in
C:\Program Files (x86)\Microsoft IoT\FFU\RaspberryPi2\flash.ffu
Step 5: Install Windows 10 IoT Core Dashboard
Now download and install Windows 10 IoT Core Dashboard (recommended)
You may also follow this link to download https://docs.microsoft.com/en-us/windows/iot-core/downloads
Windows 10 IoT Core Dashboard is used to flash the ffu image (picture below) onto your MicroSD card and also to monitor and control Windows 10 IoT devices.
Step 6: Set up a new device
Run the Dashboard. Click Set up a new device. and set up Device type: Broadcomm [Raspberry Pi 2 & 3], and OS Build: Custom , then click Browse to select C:\Program Files (x86)\Microsoft IoT\FFU\RaspberryPi2\flash.ffu, the image file installed in previous step.
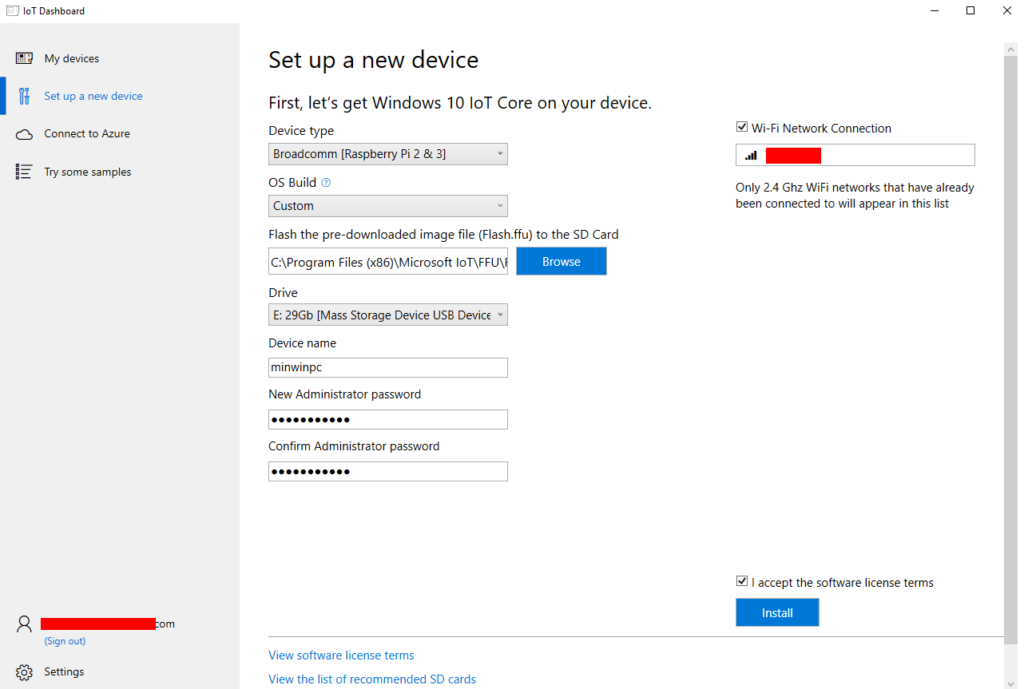
Step 7: Flashing MicroSD card
Insert an msdos or gpt formatted MicroSD card in Windows 10 card reader. The MicroSD card will be over written.
Enter Device name, Admin password, click accept and Install.
Step 8: Booting WIndows 10 IoT for the first time
Once the flashing is done, remove MicroSD Card from Windows card reader, insert into Raspberry Pi 3B+.
Make sure Ethernet cable is connected and boot up RPi.
Wait a few minutes for RPI to boot up.
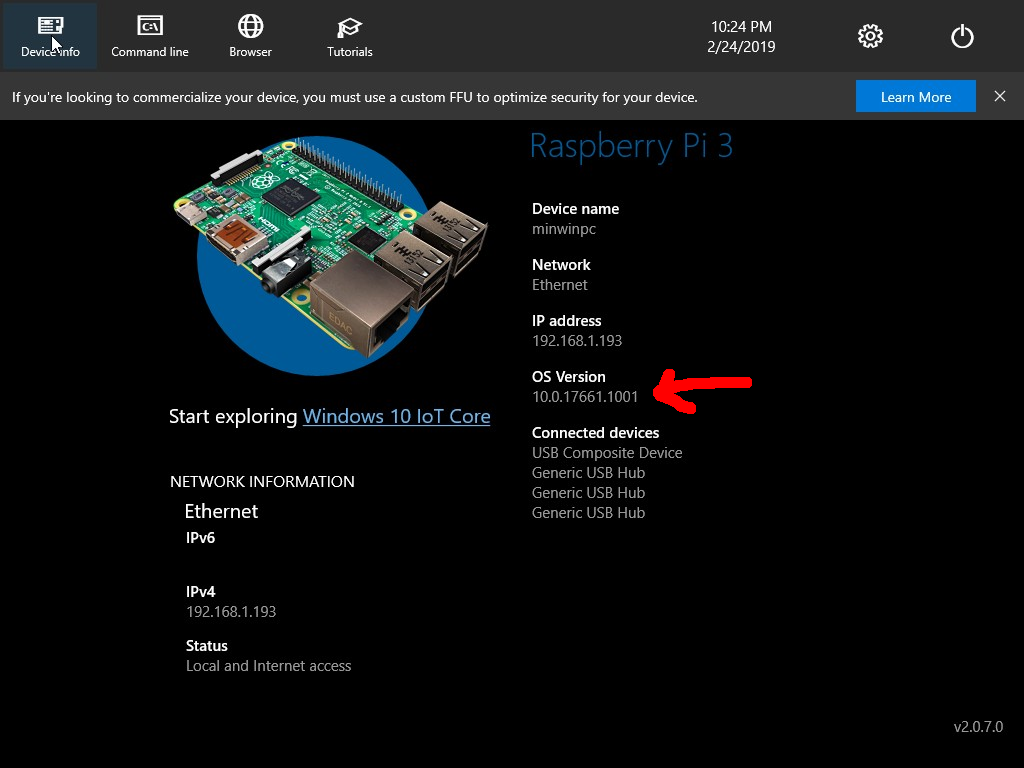
Step 9: Connecting to Your Raspberry Pi 3B+
Click My devices in Dashboard, you should be able to see the device listed. Right-click the device entry select Launch PowerShell to connect to your new IoT device for remote command prompt
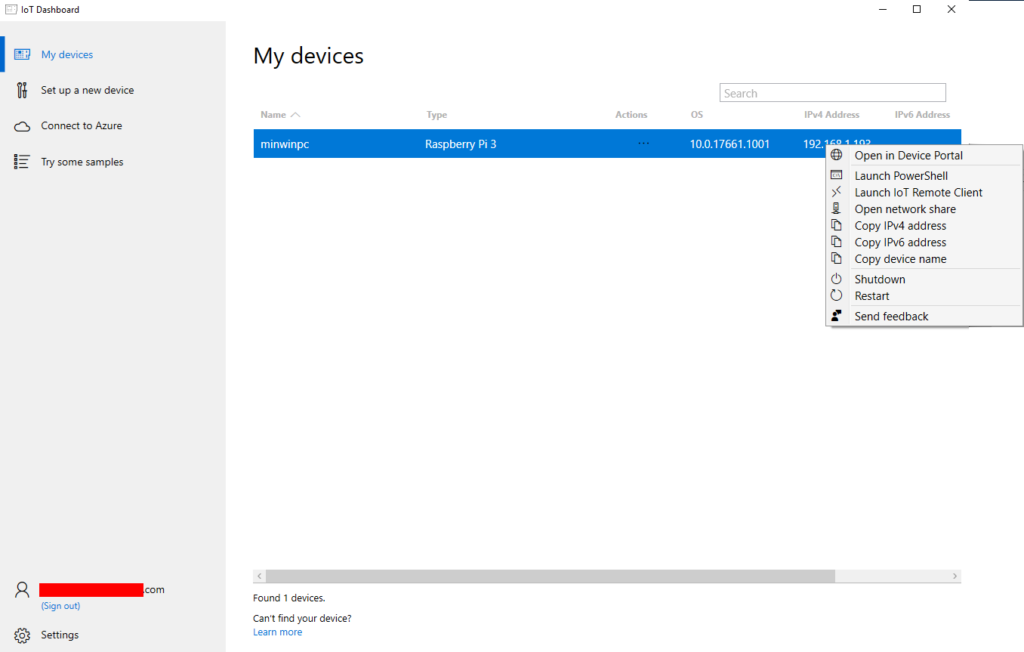
Right-click the device entry select Open in Device Portal to remotely access and control your device. Especially useful if you do not have keyboard and monitor attached to RPi.
Alternatively, open a web browser and enter URL http://[ip address]:8080 to access Windows Device Portal.
Step 10: Update Windows 10 IoT to the latest release
Upon successful start up, Windows 10 IoT should immediately run Windows Update and download the latest release.
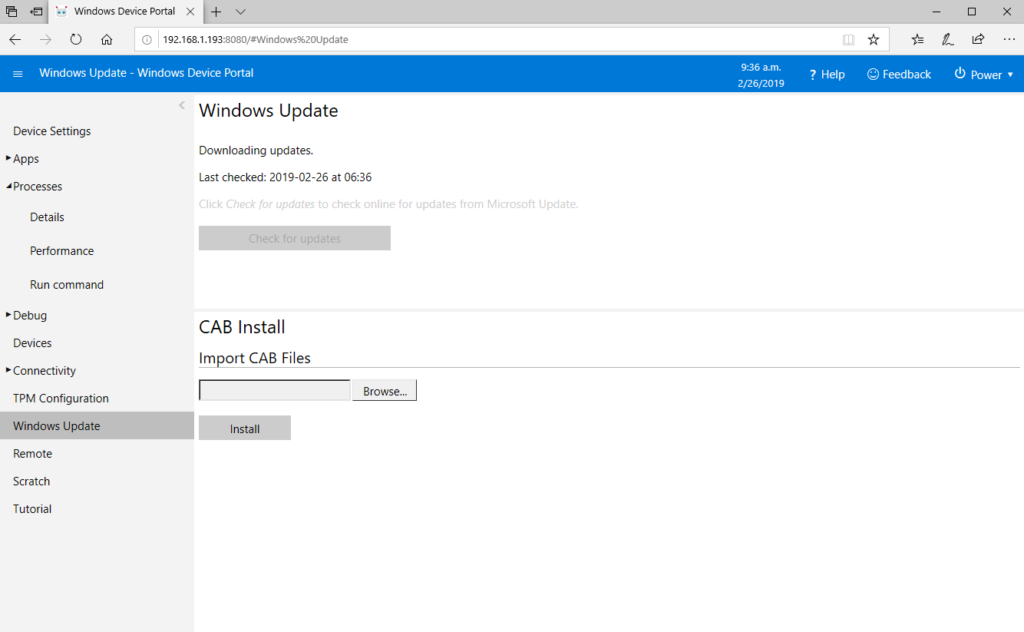
In Windows Device Portal, select Windows Update to see the progress. The downloading and updating process should be fast (depending on your Internet download speed).
If downloading takes more than 2 hour, something went wrong. Shutdown, re-flash and try again.
If download or update failed before completion, it is likely that the MicroSD card is not of good quality.

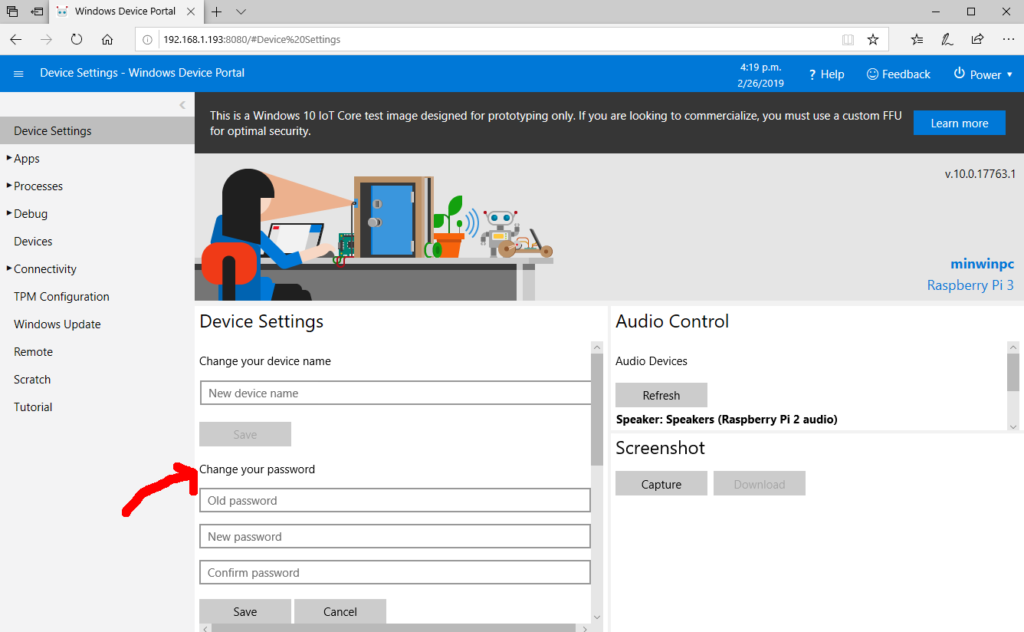
Once the device is updated, the administrator password may be changed. If you cannot login with original password, try the default p@ssw0rd . To change password, login with this default password in PowerShell, and use this command to change. Replace [new password] with your own.
net user Administrator [new password]
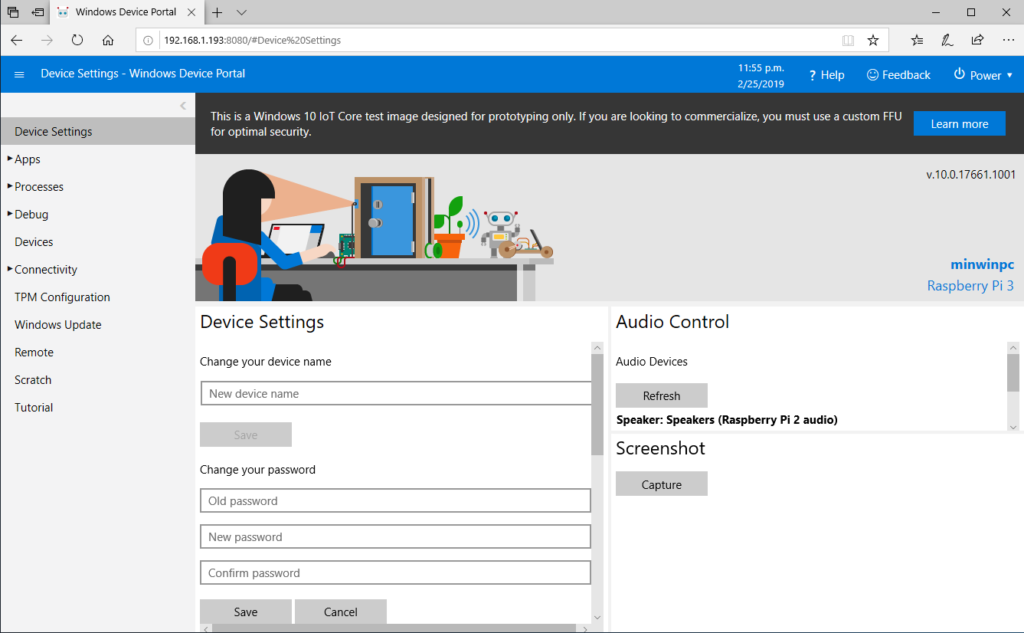
You can also change password via Windows Device Portal. In browser, open URL http://[device_ip]:8080 and login with credential Administrator / p@ssw0rd
Useful information. I will try to install Windows 10 IoT on my Raspberry Pi 3 B+.
Thank you.
i have been able to install windows 10 iot but with a little help, i changed in boot, some files. The main problem is that i dont have wifi and bluetooth. So do you know any solution about that?
I’m very new to Pi, but learning fast. Thanks for your info in simple terms. Taken me a week of scrounging to get IOT running on my Pi 3B+.
AWESOME TUTORIAL